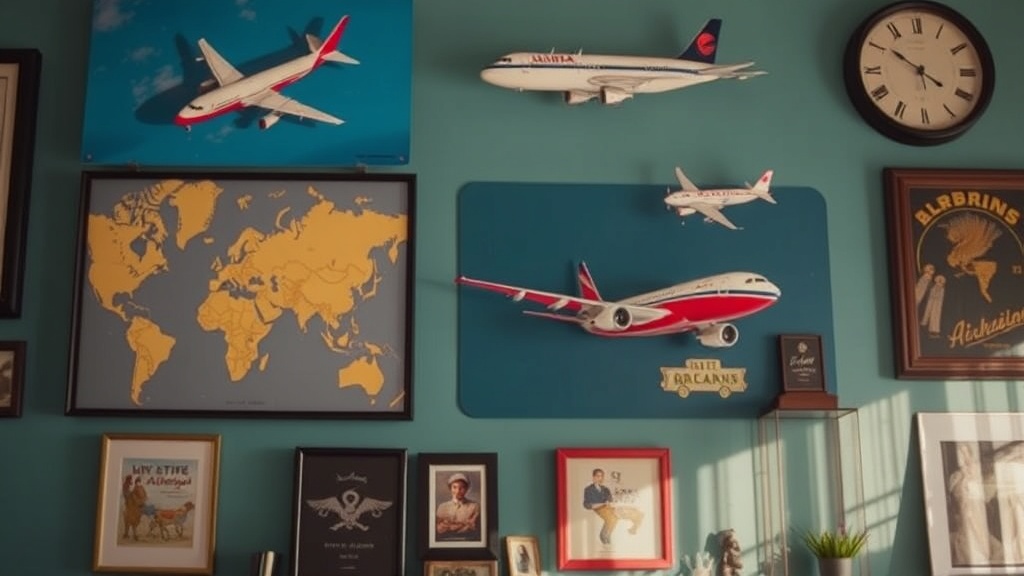
How to Build a Gallery-Worthy Airline Memorabilia Display at Home

This post covers everything needed to transform a corner of a home into a proper gallery for airline memorabilia — from selecting the right display case and lighting to arranging uniforms, models, and ephemera so the collection looks intentional rather than cluttered. Whether the focus is vintage Pan Am flight bags, brass crew wings, or complete cabin crew uniforms, a well-planned display protects value, shows off details, and turns a hobby into a room-defining feature.
What Type of Display Case Works Best for Airline Memorabilia?
The answer depends on what dominates the collection. Three-dimensional items like model aircraft, service carts, and dinnerware need enclosed cases with shelves. Flat items — posters, timetables, route maps — demand frames with museum-grade glazing. For mixed collections, a modular approach works better than one giant cabinet.
Glass-door cabinets are the standard starting point. The IKEA DETOLF (a tall, narrow case with four glass shelves) costs around $70 and fits neatly into living rooms or studies. It handles 1:200 scale models, hat boxes, and small uniform accessories without swallowing floor space. The catch? It is not dustproof. Gaps around the door let in airborne particles, so cases like DETOLF need regular cleaning — probably every two weeks if the room sees daily traffic.
For serious collectors, Case Club and Widdicomb make sealed display cabinets with tempered glass and locking doors. Prices start near $400 and climb past $2,000 for custom sizing, but the seal keeps humidity stable and dust out. Here's the thing: airline textiles — wool blazers, silk scarves, leather gloves — degrade fast in fluctuating conditions. A sealed case with a small passive humidity control pack (like Boveda 49% RH pouches) inside prevents mold and fiber fatigue.
Wall-mounted shadow boxes and deep frames suit smaller, flatter pieces. Crew wings, pins, and embroidered patches look sharp inside a Lawrence Frames 11×14 shadow box from Michael's, which runs about $25. Deeper shadow boxes (2–3 inches) can hold a folded scarf or cap badge alongside documentation. For large textiles — a full Qantas uniform from the 1970s, say — a custom-built frame from a local framing shop with Tru Vue Museum Glass is the safest long-term bet. Museum glass blocks 99% of UV rays and cuts glare so details stay visible.
| Item Type | Display Solution | Approximate Cost | Key Benefit |
|---|---|---|---|
| Model aircraft | IKEA DETOLF or similar glass cabinet | $70–$150 | 360° viewing, easy access |
| Pins, wings, patches | Shadow boxes (Lawrence Frames, etc.) | $25–$60 | Protects from dust, compact |
| Complete uniforms | Custom frame with Tru Vue Museum Glass | $300–$800 | UV protection, archival safe |
| Mixed collection | Sealed cabinet (Case Club, Widdicomb) | $400–$2,000+ | Climate stability, security lock |
How Should You Light a Home Gallery Without Damaging Collectibles?
Keep it dim, keep it LED, and keep UV emissions near zero. Direct sunlight is the fastest way to fade a vintage TWA flight attendant jacket or yellow a linen route map. Even indirect daylight through sheer curtains adds up over months. LED strips and spotlights with a color temperature between 2700K and 3000K (warm white) give enough glow to show off details without the heat and UV spike of halogen or incandescent bulbs.
Philips Hue light strips work well inside cabinets. They stick to the top frame, point downward, and can be dimmed to 5% brightness for evening viewing. A 2-meter Hue strip with a bridge costs about $80. If the budget is tighter, Govee LED strips hit a similar warm-white range for roughly $20 and include adhesive backing. That said, cheap strips sometimes flicker or shift color temperature after a year, so expect to replace budget options more often.
Worth noting: heat rises. Placing a light strip directly above a silk scarf or a leather flight bag can dry out materials over time. Leave at least 4 inches between the light source and the item, or mount strips along the side edges of the cabinet instead. Side lighting also reduces glare on glass and acrylic fronts.
For framed pieces, picture lights mounted 6–8 inches above the frame create a focused pool of light. Cocoweb makes battery-operated LED picture lights in brass and black finishes (around $45) that install without wiring. Because they run on rechargeable batteries, there's no cord clutter — and no heat buildup against the wall.
Whatever the setup, install lights on a timer or smart plug. Six hours of daily illumination is plenty for viewing; the rest of the time, the collection sits in darkness. Less light exposure equals slower fading. For more on safe lighting practices for textiles and paper, the Smithsonian Museum Conservation Institute publishes clear, practical guidelines online.
What's the Best Way to Arrange Uniforms and Fabric Items?
Never fold them tightly, never hang them on wire hangers, and never crowd them against glass. Airline uniforms — especially wool-blend suits, structured hats, and embroidered jackets — need breathing room and proper support to keep their shape.
For hanging display, use padded, contoured hangers covered in cotton or linen (like those from The Container Store or Gaylord Archival). A padded hanger distributes weight across the shoulders and prevents the pointy creases that wire hangers create. If the uniform includes a skirt, hang it separately on a wide clip hanger lined with acid-free tissue so the waistband doesn't warp.
Inside a frame or shadow box, textiles should be mounted using sewing mounting — small, loose stitches through sturdy seam allowances into an acid-free backing board — rather than pins, staples, or adhesive. Adhesives yellow and stiffen fabric; pins leave permanent holes. Gaylord Archival sells acid-free mat boards and unbuffered tissue paper specifically for textile mounting. A full uniform mounting kit runs about $35.
Hats and caps need internal support. Aacid-free tissue stuffed gently into the crown holds the shape without stretching the band. For display, place the hat on a covered stand or mount it at a slight angle inside a deep frame so the badge or embroidery faces the viewer. Straight-on, flat mounting looks — let's be honest — like a police booking photo.
How Do You Protect Paper Ephemera and Posters?
Airline timetables, route maps, promotional posters, and ticket jackets are almost always printed on acidic paper that becomes brittle over decades. The goal is to slow that decay by limiting light, humidity, and physical stress.
Frame paper items with acid-free matting and UV-filtering glazing. The mat creates a small air gap between the glass and the paper surface, which prevents condensation from sticking to the print. A standard 18×24 poster frame from a big-box store usually lacks both features, so plan to upgrade the components or order a custom frame. Frame Destination and PictureFrames.com both sell conservation-grade frames with UV acrylic starting near $60.
For unframed storage — items rotated out of display or kept in reserve — use polyester sleeves (Mylar D) or acid-free folders stored flat in an archival box. Never roll posters long-term; the curl becomes permanent and the outer surface cracks. Lineco makes museum-quality storage boxes in various sizes, typically $25–$50. Keep boxes off the floor (in case of flooding) and away from exterior walls where temperature swings are widest.
Here's the thing about old tickets and boarding passes: the ink is often thermographic or carbon-based, and it can transfer if items are stacked face-to-face. Slip a sheet of unbuffered acid-free tissue between each piece. It takes an extra minute. That minute saves a smudged Pan Am first-class ticket from 1968.
What About Security and Insurance?
A gallery-worthy display is visible. Visibility invites risk. Locking cabinets are the first line of defense, especially for high-value pieces like limited-edition crew wings, signed photographs, or complete uniforms from defunct carriers. Even a simple glass-door cabinet with a hasp and small padlock deters opportunistic theft.
For collections valued over a few thousand dollars, a standard homeowner's or renter's policy may not cover collectibles without a scheduled rider. Call the insurance provider and ask about a collectibles rider or personal articles policy. Companies like Collectibles Insurance Services and Huntington T. Block specialize in insuring memorabilia and typically require an inventory list with photos and estimated values. The premium usually runs 1–2% of the total insured value per year — a small price for peace of mind if a pipe bursts or a break-in occurs.
Document everything. Photograph each item against a neutral background, capture maker's marks, labels, and any provenance documentation. Store digital copies in cloud storage and a physical binder in a fire-safe box. If the worst happens, the recovery process is faster with solid records. The American Institute for Conservation offers guidance on disaster preparedness for private collectors.
Quick Maintenance Routine
Displays need upkeep, but not much. A 15-minute monthly routine keeps dust, pests, and humidity in check:
- Dust glass and shelves with a microfiber cloth. Avoid feather dusters — they scratch acrylic and scatter dust into cabinet crevices.
- Check humidity indicators (small hygrometer disks cost about $8 on Amazon). If the reading climbs above 55% or drops below 35%, adjust the room's dehumidifier or humidifier.
- Inspect for pests. Look for tiny holes in wool, shed larval skins, or webbing in corners of cabinets. Cedar blocks help deter moths, but they do not kill existing infestations.
- Rotate displayed paper items every three to six months. Store the rotated pieces flat in archival boxes to give them a break from light exposure.
- Tighten loose hardware on frames and cabinet doors so nothing shifts or rattles.
A thoughtful display does more than store objects — it tells the story of aviation history through the uniforms, models, and printed materials that passengers and crew carried with them. Start with one solid cabinet, add warm, safe lighting, and build outward. The result will look like a corner of the SFO Museum tucked into a living room in Kelowna. And that's exactly the point.
Steps
- 1
Choose the Right Location and Shelving
- 2
Use UV-Protective Lighting and Cases
- 3
Arrange Items by Era or Airline for Impact